Azure VPS setup notes » History » Revision 59
« Previous |
Revision 59/65
(diff)
| Next »
Jon Goldberg, 11/19/2025 07:29 PM
{{last_updated_at}} by {{last_updated_by}}
Microsoft Azure - Setup
For the Client
Hi there! If I've directed you to this page, the part that concerns you are the first three sections only. It's a bit convoluted, so feel free to ask me if you run into trouble! -Jon
[NOTE: Most of Microsoft's pages break with an ad blocker enabled.]
Get a Sponsorship
- Go to the Nonprofit Microsoft Getting Started page. Fill out the paperwork to be approved as a 501c3. Approval can take 1 day or 3-4 weeks - I've seen both multiple times.
- Once approved, go to https://www.microsoft.com/en-us/nonprofits/azure to claim credits (or go directly to Claiming Your Credits.
- You'll know you're successful because you'll see a sponsorship listed on the Sponsorship Page.
Create a Subscription
- Check that you have credits in your sponsored account: https://www.microsoftazuresponsorships.com/Balance
- Visit the Azure Portal.
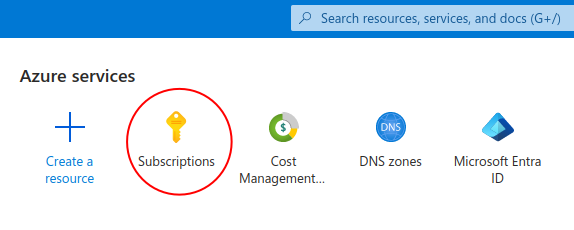
- Click the Subscriptions icon.
- Click the Add button.
- Add a subscription of type "Microsoft Azure Sponsorship" from the Azure portal. You will likely need to select Show other subscription types to see it.
- Note: Even sponsored subscriptions require a credit card, make sure you have one available.
Grant access to other users
Microsoft has made recent changes to this system, so these are experimental instructions. I may ask you to take additional steps!
- Log in to https://entra.microsoft.com.
- Select Users from the left navigation menu.
- Click New User » Invite External User.
- Add my email (jon@megaphonetech.com) and display name (Jon Goldberg).
- On the Assignments tab, click Add Role, then grant me the Global Administrator role.
- Go to the Review and Invite tab, and click Invite at the bottom of the screen.
On Renewals
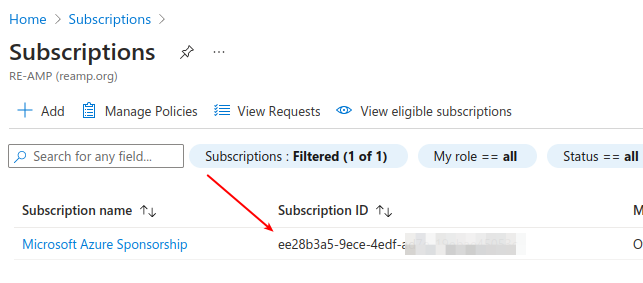
You will need to renew every year. Instructions for this are incomplete - but you should go to your Azure portal and click the Subscriptions button (see screenshot 1 below). Find the subscription ID (screenshot 2) - it's a string of numbers and letters. Then go to https://www.microsoftazuresponsorships.com/Balance and assign your new credits to the existing subscription.
If you did not do this in time, you should be able to open a support ticket with Microsoft to request a refund.
Screenshot 1
Screenshot 2
Technical Configuration
To set up a free account, you must:
- Get a Sponsorship (see above)
- Create a Subscription linked to the Sponsorship (see above)
- (Strongly recommended) Grant access to the subscription to other users.
- Create a Resource Group linked to the Subscription
- Create a Virtual Machine (and associated resources) linked to the Resource Group
Create a resource group
- Select "Resource Groups" from the main Azure portal (left sidebar).
- Select Create and give it a name.
- Your subscription should be pre-selected since you only have the one.
- Click Review and Create, then Create.
Create a virtual machine
- Click on your new resource group in the Azure Portal.
- Click Create.
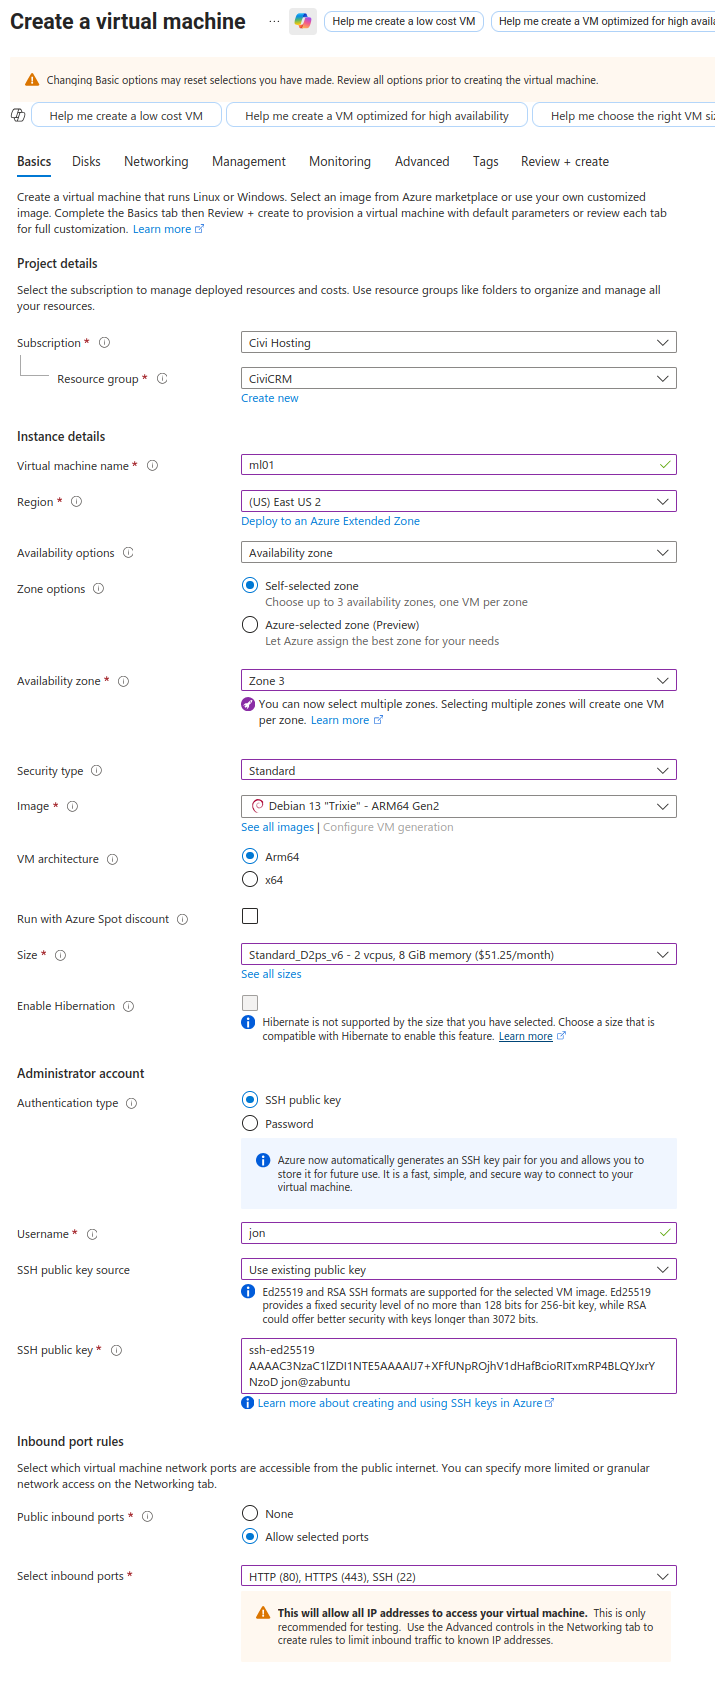
- Search for the name of the image you want (e.g.
Debian 13 "Trixie).- If you picked an image that shows an hourly cost, it's the wrong one.
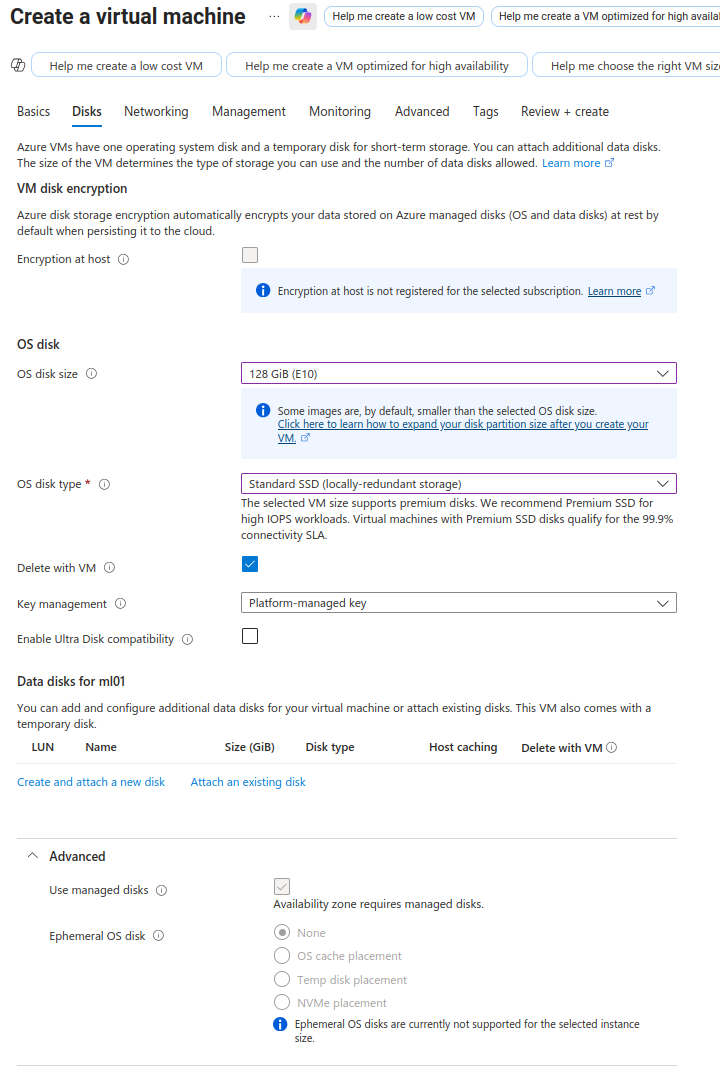
- See the screenshots below for configuration of the "Basics" and "Disk" tabs. The other tabs I keep with the defaults. My standard VPS type is now
D2ps_v6.- "D2" is general-purpose VM, we always select this. "a" is AMD-series (old preference), "p" is ARM64, "d" is temp disk included (we don't need this), "s" supports premium SSD disks. v6 is the latest gen, always use the latest gen.
Post-provisioning configuration
Get serial console working
Serial console is necessary for single-user mode, and troubleshooting if SSH fails.
It's normally working out of the box now. Go to "Serial Console" in the VM left navigation. If it doesn't work:
- Go to Boot Diagnostics in the VM's left nav.
- Click Settings at the top.
- Select Enable with managed storage account.
- Save.
Now Serial Console will work.
Modify Firewall Rules
- Click on your new virtual machine in the Azure portal.
- Click Networking in the side navigation.
- You should see your firewall settings. They should look like the screenshot below, except they'll be missing the two items circled.
- Add the "allow_ping" and "Port_5665" rules to the Inbound Port Rules as shown in the screenshot.
.png)
Add a swapfile
Complete instructions are here but in short, add this to /etc/waagent.conf for an 8GB swapfile:
    ResourceDisk.Format=y
    ResourceDisk.EnableSwap=y
    ResourceDisk.SwapSizeMB=8192
Then run service walinuxagent restart.
Updated by Jon Goldberg 8 months ago · 65 revisions